

Linking is very basic for anything constructed of wire, and you’d be well-advised to master this skill by making many, many links in copper before trying your skill on silver and gold. How you link is, first cut a convenient and easy to handle length of .22 gauge wire, about ten to twelve inches long.
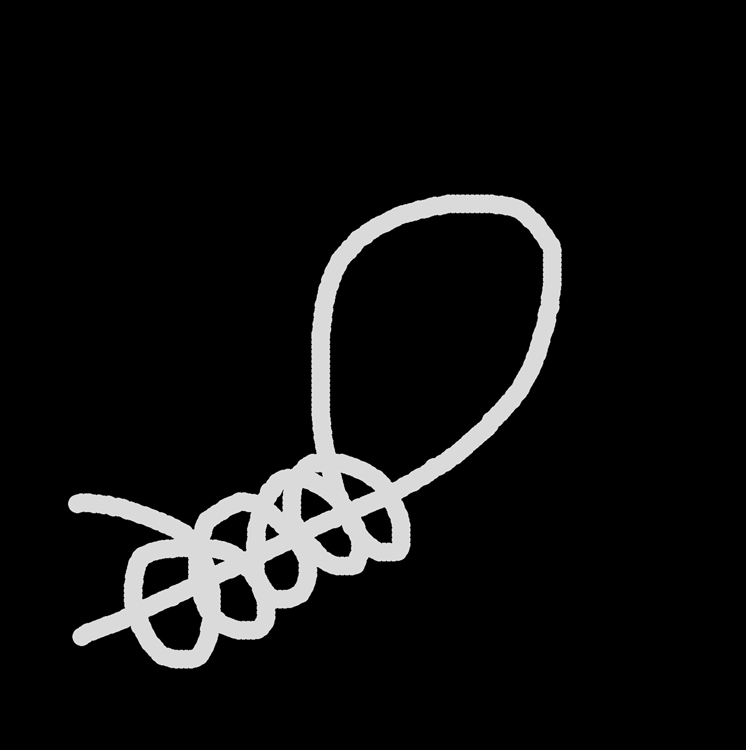
With your flush-cutter, clip off the very end of the wire with the flush side toward the larger piece. Cut off as LITTLE as possible — every bit of weight counts, both with precious gemstones and precious metals.
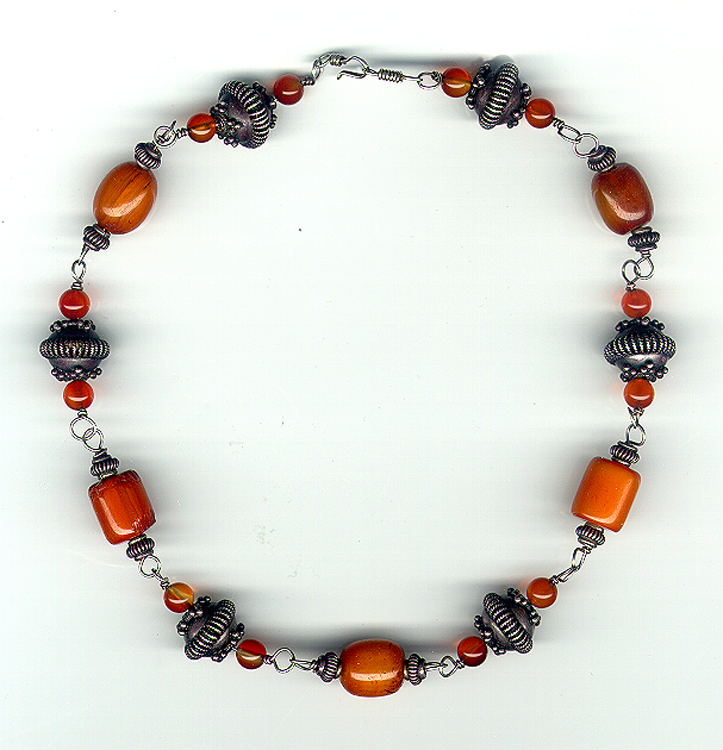
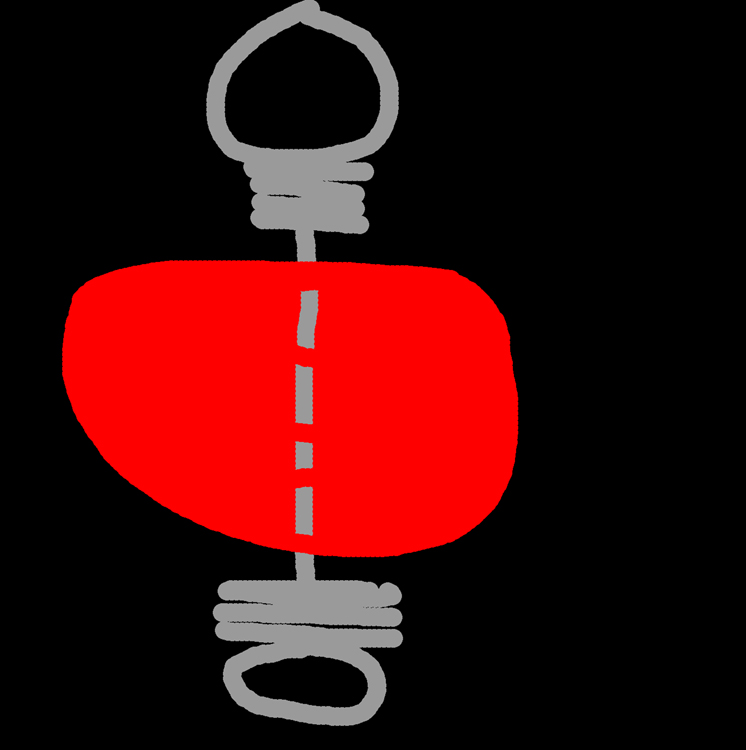
Using your needlenose pliers, place the tips about 2 inches from one end of the wire, and gently coax the wire into a bend back onto itself, and then deftly turn the wire and wind it around itself, as shown in the illustration below:
You will eventually learn how to make the wire stay close together to make the effect you want. Consult the photos to see how it should look.
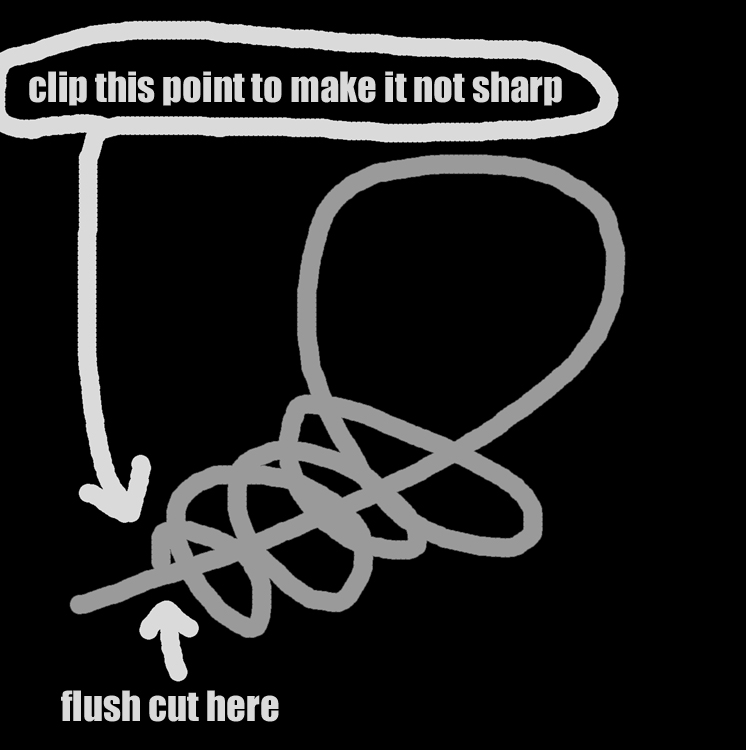
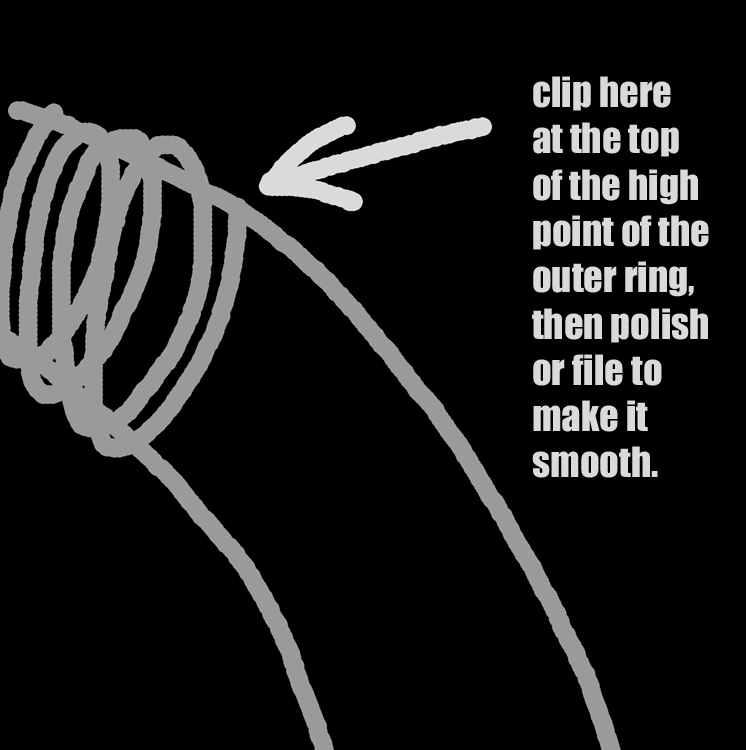
It’s best to clip the wire where you can reach it easily with a buffer or FINE ring file, and I like to clip the wraps on rings so they don’t tend to land where the skin can feel it, which means on the high point of the shank.
Make certain that the flush side of the cutter is toward the ring, not toward the extra wire in your hand. In this case, the ring can be a finger-ring, or the loop created for an earring, a necklace or a bracelet — the concept is the same, make certain there are no sharp points or rough edges, and that starts with good clipping.
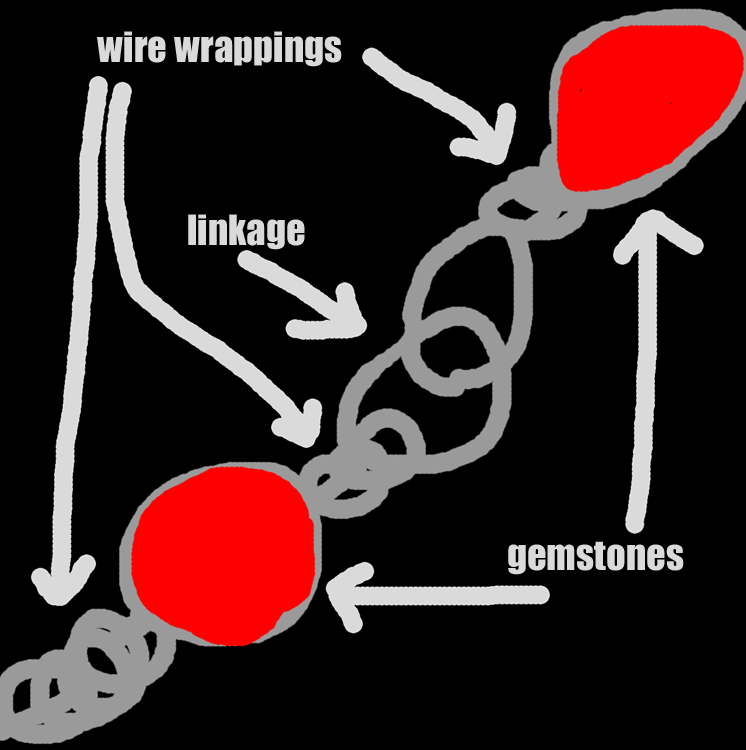
The wire windings in the illustration are loosely drawn to help you understand how they set up on the wire base, but you’ll wind them very closely, each winding as close as possible to the next course of wire winding, just as you’d wind a radio coil. The coils should actually touch each other all the way around the turning.
Note please that the wrappings and linkages must be fairly CONSISTENT throughout the piece, and if they aren’t, if they get a little out of hand now and then, you need to practice the winding technique more. Your windings must NOT EVER be sloppy.
Linking .22 gauge wire is an art, not a science. It’s all about “moves” and how gracefully your hand can wave through the air. Winding is literally a form of hand-manipulation magic, and some foundation can be realized with a serious practice related to the French Drop, which translates into well-made jewelry when properly mastered.
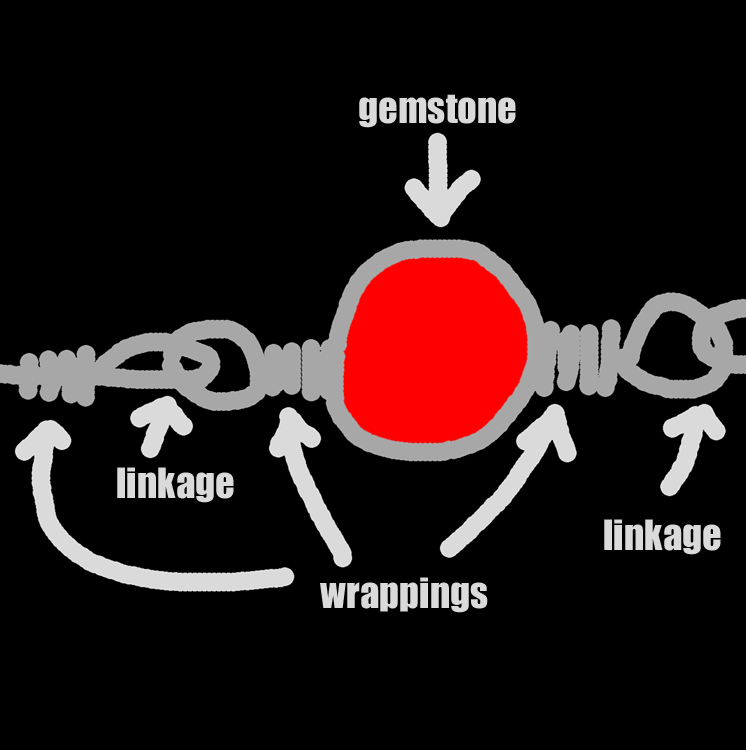
Each ELEMENT of the piece is a world unto itself, a complete thing. The linkage connections must be made as you proceed — they cannot be linked after the element has been sealed with the final wrap & flush-cut clipping.
There’s really nothing to it — it’s simple beyond belief — yet you’d be surprised how few people actually MASTER the technique. It’s usually enough to just do okay at it to satisfy the marketplace, but to really get it down is quite a skill, and it is a worthy goal of the Stone-Age Jeweler to attain a high degree of perfection in the linking and winding of the wire.