

All jewelry, in fact all engineered structures, have one thing in common; they are made up of a collection of elements. What is an element? It is a single repeatable item — in the case of JAL jewelry, this consists of a series of beads on a wire, to wit:
- Form a loop at one end of the 4″ long .20 gauge copper wire.
- Wrap the end of the wire to finish the loop.
- Press the cut end of the wire deeply into the wrapping so it doesn’t catch on anything.
- Thread on a 4mm round copper bead.
- Add a spacer bead.
- Add a bead cap if wanted, with the hollow side toward the main bead.
- Add the gemstone or main bead.
- Add a bead cap rotated opposite the first cap.
- Add another spacer bead.
- Add another 4mm round copper bead.
- Make a loop to close off and finish the element.
Okay, now you can wire another element onto that one, and so forth, until you’ve made a necklace, bracelet, earrings or pendant.
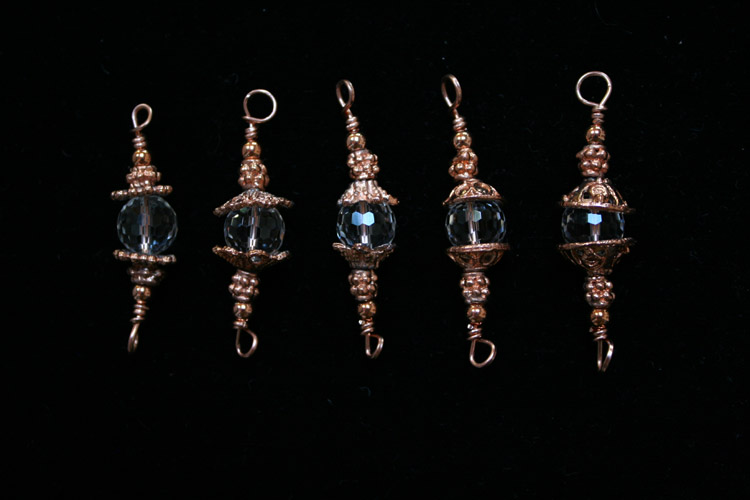
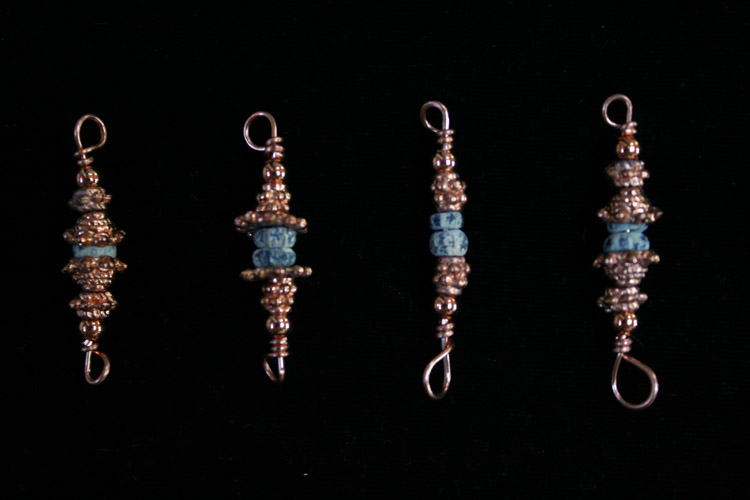
Alteration of any one of the beads within the element causes the element to change quite fundamentally. Note the differences in length of the various configurations of caps and spacers in the photo above.
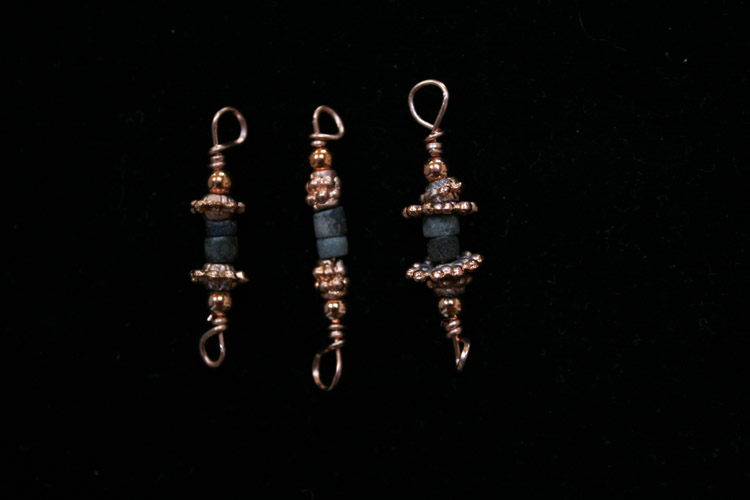
You can make serious changes in the construction just by changing the beads or the way in which the beads go on the element. Note in the above photo that the Sumerian beads have more protection from rubbing and impact in the elements on either side, and the center element is more open, meaning the Sumerian beads will probably take more punishment from wear & tear. In the case of tough stone like this, it’s no problem, but with glass and other fragile beads, it’s best to use the more protective flared beads and caps.
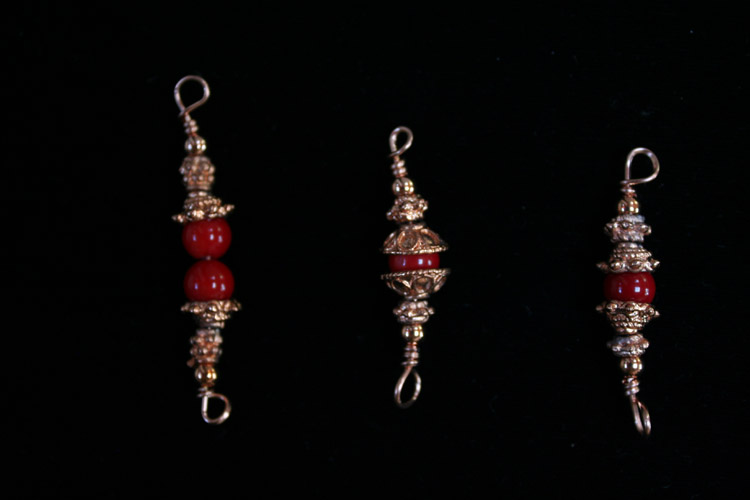
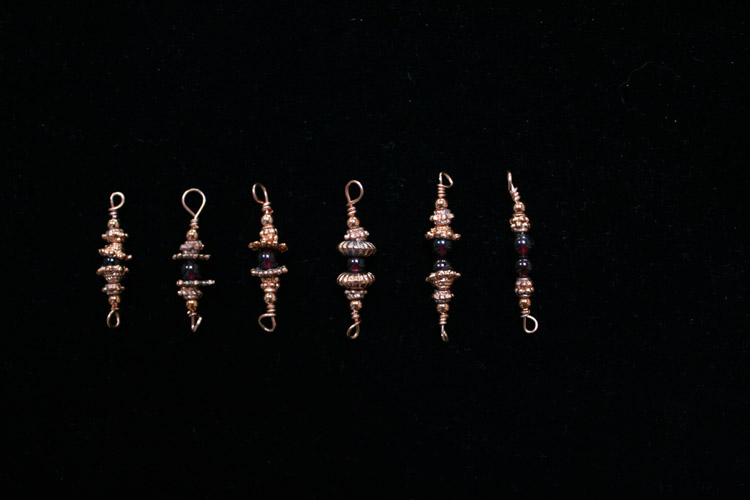
Note in the above photo that the coral beads are doubled in the element on the left, dome-capped in the center element, and spike-dome capped in the element on the right of photo. All three examples of elements fall well within the scope and range of Hellenic Greek jewelry formulae, and could have been found in jewelry examples anywhere from 4500 B.C. all the way to Medieval times.
Of course, in modern times, all the previous styles become available as the ideas are re-processed, rediscovered and revived.
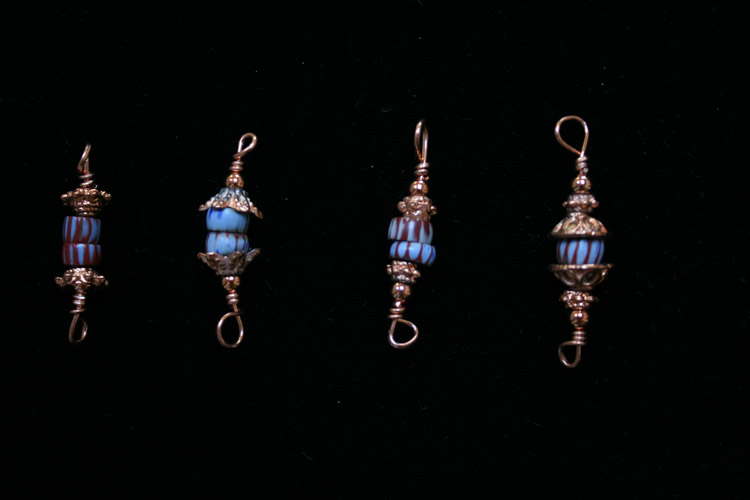
In the above examples, you see spikes, donuts, wheels, hollow caps & hedgehog spacers. Note that in the element on the far left, there is only one glass bead between the domed caps. In the other three examples, two Roman glass beads are stacked together with no separator between them. You could use a separator there, but the ancients typically did not.
It’s easy to create different designs from the same beads, but in the case of the Sampler Kit, you get about a dozen varieties of copper findings. The metal parts of the element are called “findings”, while the wire that holds it all together is called “the wire”. Both are metal, but it creates confusion to call them “metal”. Be specific — do you mean the wire, or the metal findings?
Typically, in ancient times, garnet would have been associated with gold, but the masses wore copper, brass and bronze — there are slight differences between the metals — brass and bronze are amalgams, copper is just plain copper, with trace amounts of “other”, mostly lead and nickel.
Copper looks a lot like gold, and you can actually have the copper plated with any karat level of gold you want — 18k or 24k, for very little money. It doesn’t take a lot of gold to gold-plate something. Gold leafing, gold plating and gold-filled are three totally different things, with widely varying values.
Copper is so much cheaper, that you can make almost anything you want, and a lot of it. If you were working in gold, you’d have to slow down considerably. It’s true that gold is popular and desired and highly prized and valued by almost everyone as a precious commodity.
If you use $750 worth of gold in a jewelry item, then charge $950 for it, you’ve made $200 for all your labor, and risked $750 of your own hard-earned money to buy the gold and hope someone comes along who likes what you did with it enough to pay you what it’s really worth. This is an event so rare that it makes news headlines when it happens.
You have a better chance of selling gold items at a better price, but you take on the additional burden beyond your art & skills, of convincing a customer to pay for the gold without realizing that the gold has street cash value — it can be turned in anytime for melt price, which is the same as a cash refund, but the customer will NOT GET IT. You’ll never convince the customer that they’re getting value back in the form of gold, so give up, and work in copper like the rest of us.

Six examples of legal ivory set in a variety of domed copper bead caps & spacers.
On the left is the “Japanese Lantern” style that I sell quite a lot of. The other examples show a floral cap, leaf cap, small dome cap, leaf & hedgehog combo, and on the far right, the large dome cap with a hedgehog between the ivory beads in the center, dorje style.
These are just a few examples of the thousands of combinations you can come up with on your own when you have the Sampler Set in your hands!!! You get HUNDREDS of incredible Indian copper beads in this wild assortment of caps and spacers, plus 100 4mm round spacer beads to make 50 elements, and you can make elements for .16 gauge wire that don’t include the 4mm round.
The 4mm round copper bead works well with .20 gauge wire, but does not accept .16 gauge wire, so must be eliminated from all .16 gauge designs. You can use your end-beads or make a small rondel out of .16 gauge wire wrapped on a small screwdriver shank and flush-cut on both ends, as I’ve shown elsewhere.
Caps and spacers can be shuffled around to make other great combinations. Don’t be afraid to experiment. You can try different combinations without sealing off the second end, remove beads, try others, just by keeping the end of the wire open until you decide on a pattern.
There are literally thousands of combinations that you can try.
See You At The Top!!!
gorby