

Jewelers in ancient times had various tools available to them, depending upon the culture, the level of culture, the opportunities available to them or to their friends and families, but mostly it rested upon the traditions passed on through the generations.
Jewelers today have the same practices — many secrets are guarded and passed on only from father to son, mother to daughter, aunt or uncle to nieces & nephews. In short, they trust only family with these secrets.
I’ve never subscribed to that tradition.
I freely give any and all skill points to whomever wants them, along with character points and any accruances. Why? Because I don’t need the extra edge. It’s already almost too easy for me now. With serious competition, I can whet my blade and take to the field of battle.
In short, I keep busy, and don’t count the wages. Money has only one use. Give me a stone-age jewelry practice anytime, and don’t tell me how much money I’m losing in the process. I care not. Stamping out pop-culture crap Objects of Personal Adornment is not my way.
I’m in in strictly for the reincarnation. Handling and wearing antiquities is a powerful and enjoyable way to get in touch with your ancient world past lives, to re-member yourself, put your many selves back together.
There’s a fear that the lives will mangle up and interfere with your present life. That just isn’t true. The memories are just as distinguishable from present time events as your memories of this lifetime.
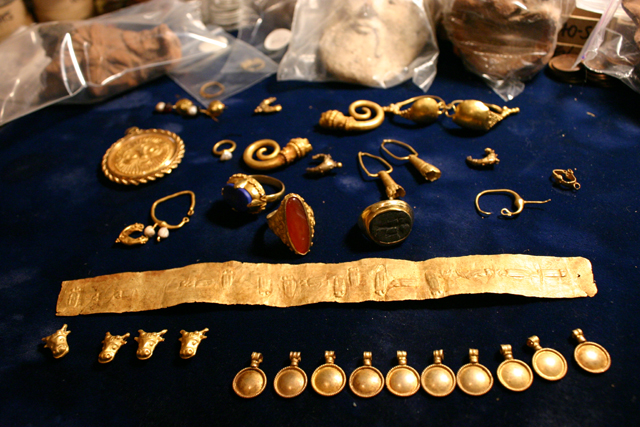
With this goal in mind, that is to say, contacting past lives in a fun and comfortable way, let’s approach the task of building a Ring of Power using an ancient artifact bead that measures about 6mm in width, about 1/4″ or so if you don’t YET have a millimeter measuring thingy of some kind or another, possibly a caliper for measuring stones.
Take a length of .12 gauge or .14 gauge rink shank wire around a ring mandrel at a slightly smaller size than you want to end up with.
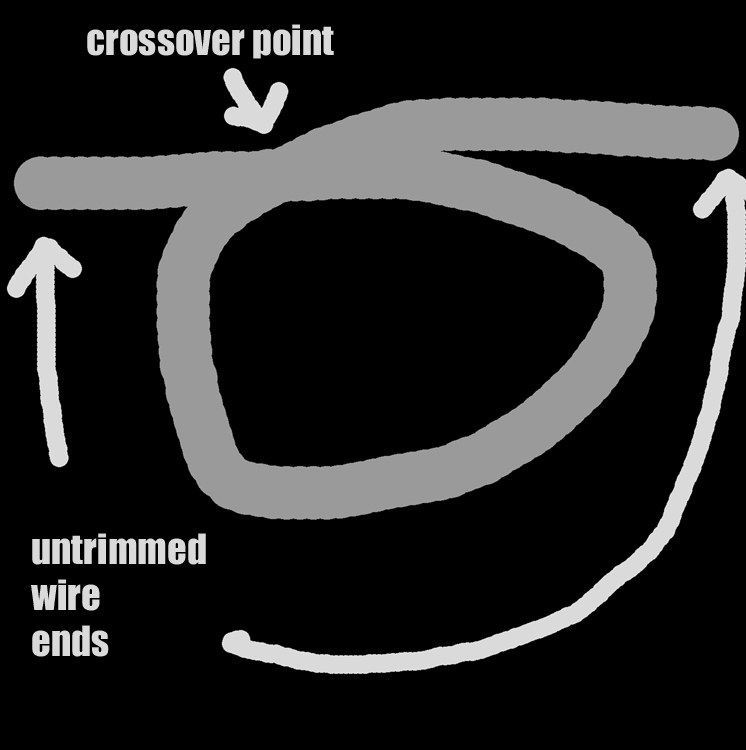
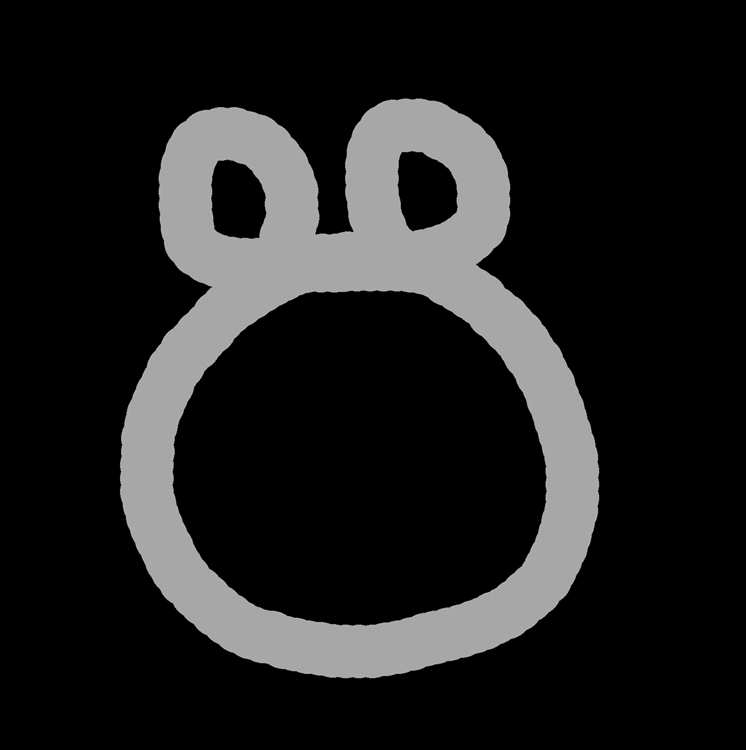
With a smooth magical gesture, wind the ring shank to create two identical ends of equal length extending outward from the ring about 15mm, not quite 3/4 of an inch in either direction.
Take the ring that you have formed on the mandrel off the mandrel, and clip the long end so it matches the other end as closely as possible, or a little longer if you can’t decide.
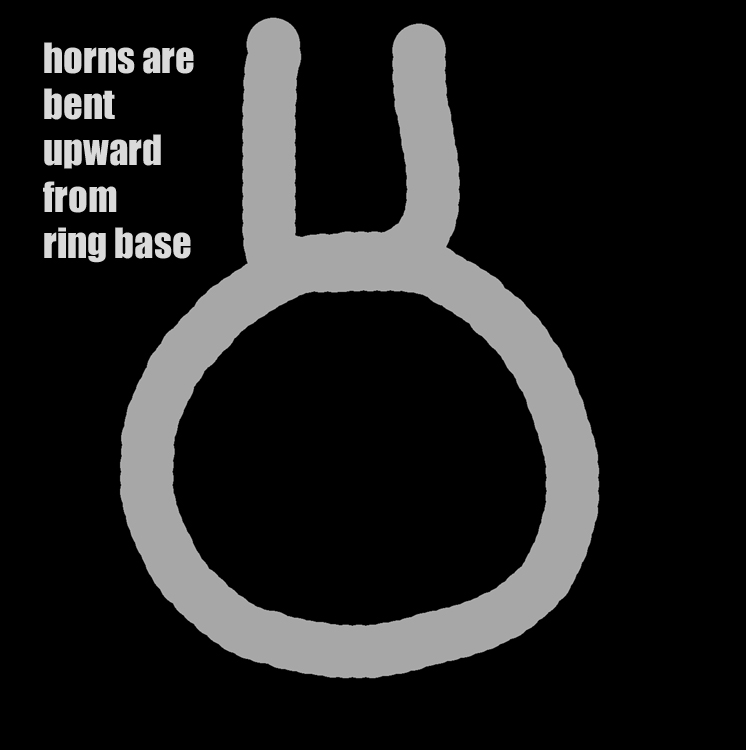
With your jeweler’s needlenose pliers, bend the ends of the shank wire upward so that the space between them is about 6mm wide inside the base of the “horns”, the upwardly bent part of the ring shank.
Here’s where to grab the wire in the needlenose pliers:
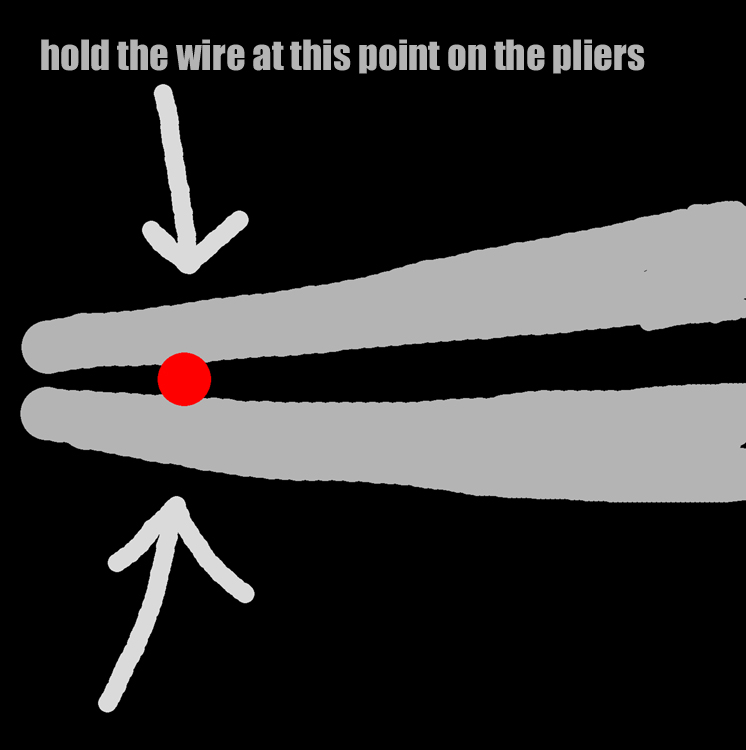
I guess I’d better show you where to grab the wire with your needlenose pliers when making large loops for hanging spoons or paddles or multiple connections.
Using your needlenose pliers, gently COAX one horn of the .12 gauge or .14 gauge SHANK wire around to form a small loop on top of the ring shank from one side of the crossover to the other, then do the same with the other horn, so they come out about equal in all respects, including angle, which is 90 degrees from the main shank.
You should now have two rings on the top of the main ring shank, and they should be facing each other to receive the cross-wire.
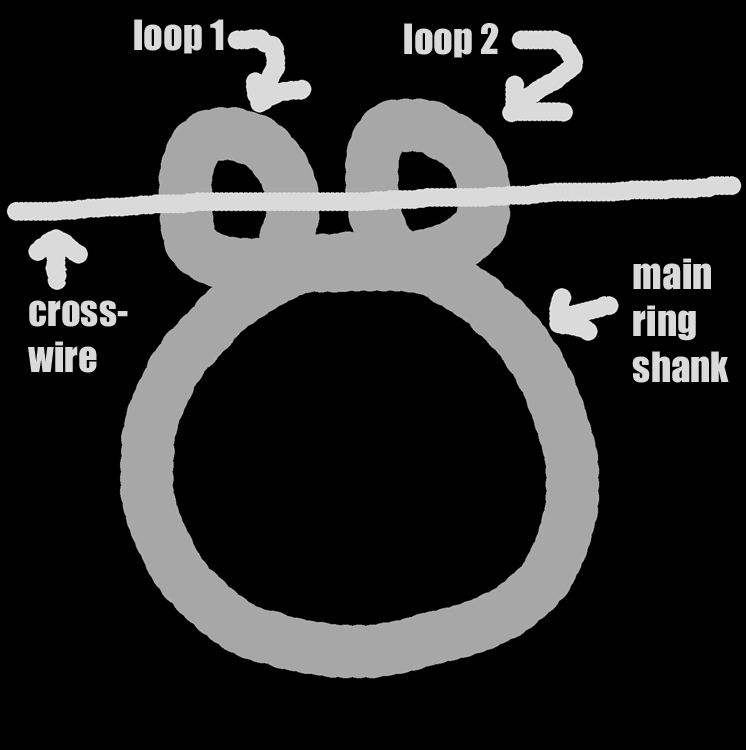
Put the .22 gauge wire through both loops of the ring, and then pull it back out. They should pass easily through both of the facing top-rings that you bent into shape, without a problem. Now you’re ready to place the stone in the ring.
Select a stone that measures about 6mm in width and about the same in diameter, making sure that a .22 gauge wire will easily pass through the drill-hole of the gemstone or artifact.
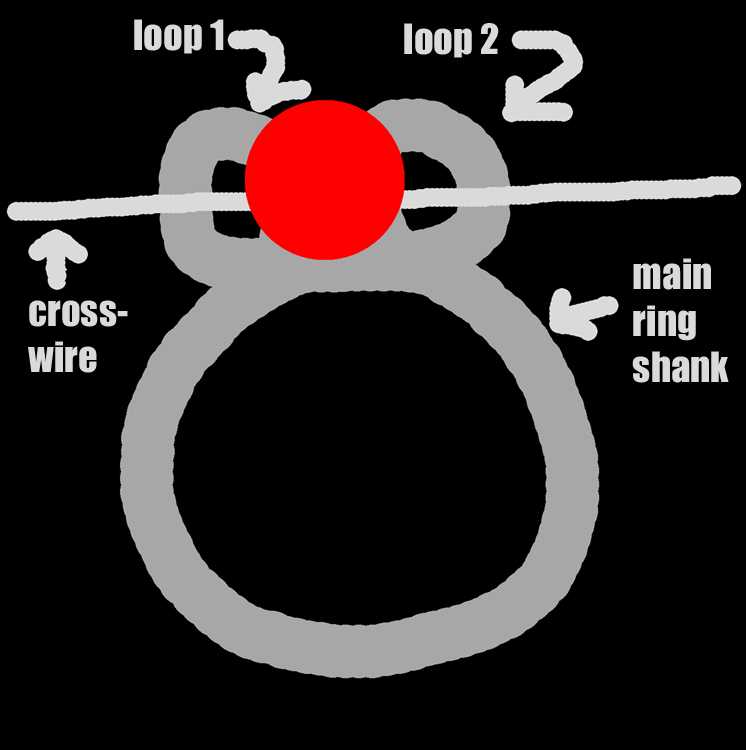
Place the ring-stone, artifact or gemstone BETWEEN THE LOOPS at the top of the main ring shank. Make sure the holes are more or less lined up to receive the cross-wire.
CUT a length of .22 gauge cross-wire at 6 inches or about 150mm.
Pass one end of the 6 inch long .22 gauge cross-wire through LOOP 2, then through the gemstone, then through LOOP 1.
Make sure that both ends of the cross-wire are as even as you can get them. Don’t fudge this step — sloppiness will be magnified in this instance.
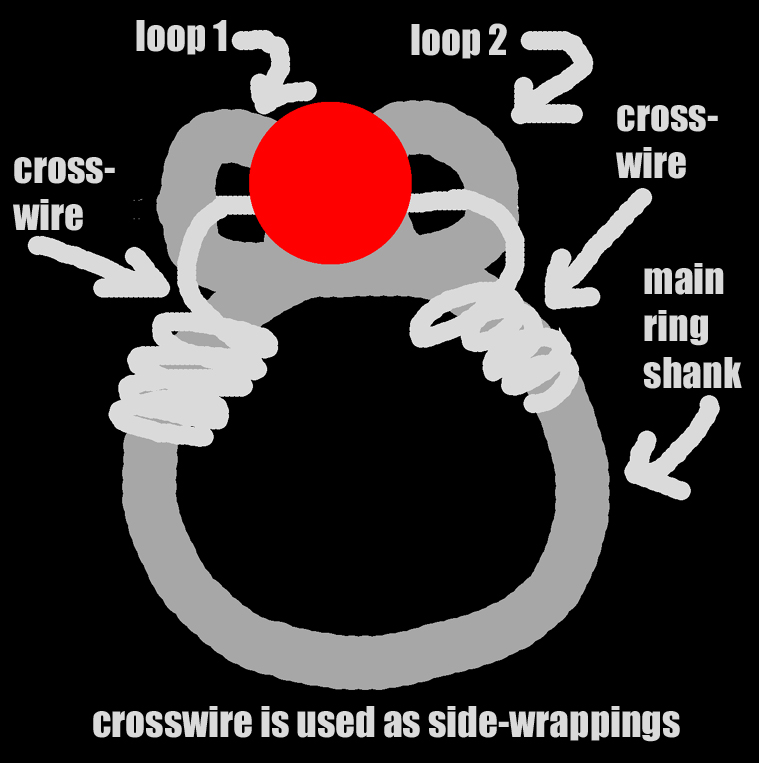
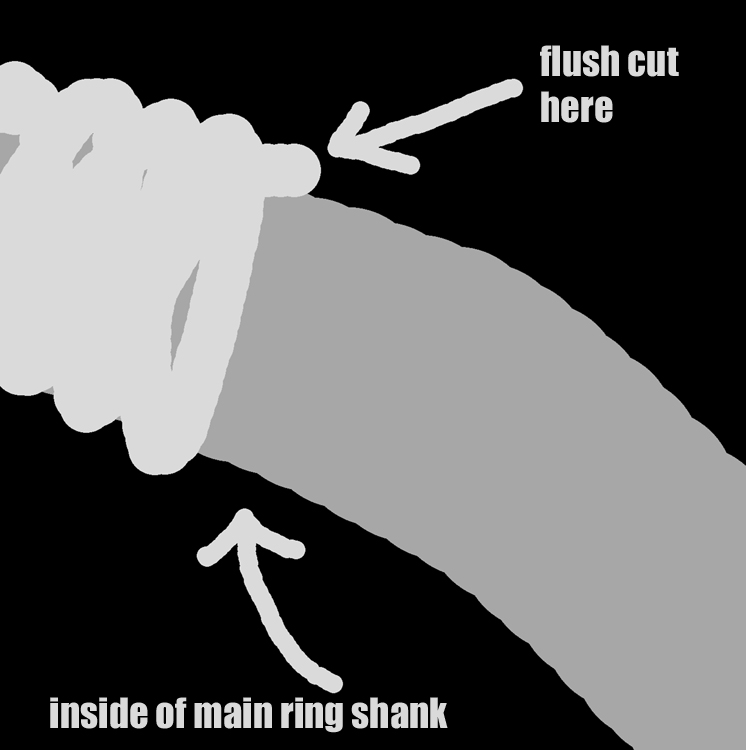
Bring the .22 gauge cross-wire around and around the main ring shank, keeping the windings very close together, wires touching the previous wind all the way around, until there is a very short length of wire remaining, then use your flush cutter to remove the very tip, making the cut at the high point of the outside of the shank.
Now all you need do is file the end of the winding wires and polish them down a bit with a wheel, then hand-polish the whole ring with a professional jeweler’s polishing cloth, using NO Jeweler’s Rouge or polishing compound other than the jeweler’s cloth.
Do NOT polish an artifact, but DO polish a gemstone. Gems like opals tend to shatter if mishandled, so don’t try them until you develop good skills and habits.
That’s the whole of it for making a Stone-Age ring.
See You At The Top!!!
gorby