

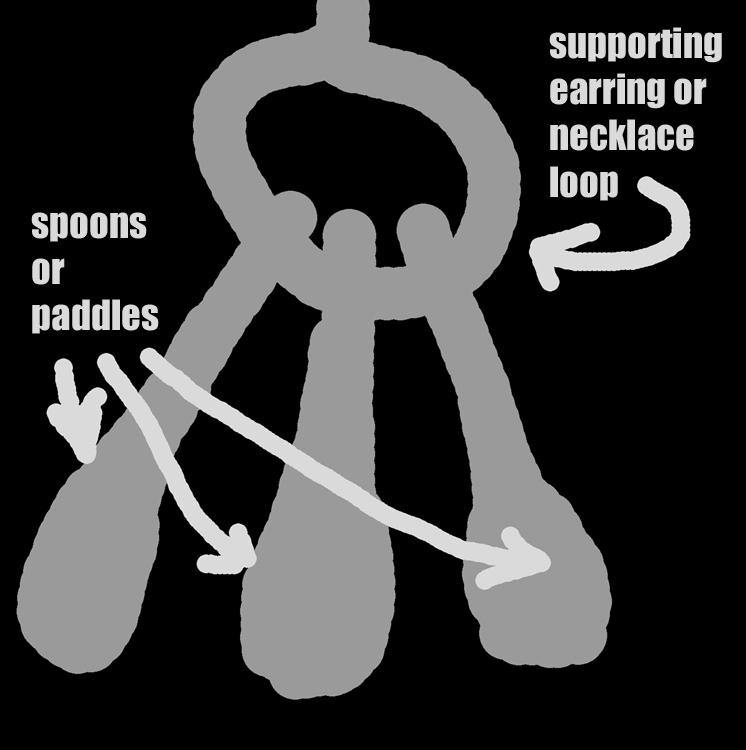
You can leave a large loop at the bottom of your earring element, so you can hang some dangling bits, called “spoons” and “paddles”, depending upon whether they are beaten or hammered with the ball part of your ballpein hammer, or the pein — flat — part.
A flat dangly bit is a paddle. A curved dangly bit is a spoon. I prefer paddles, because they’re easier and quicker to make and they run little risk of ending up sharp. Spoons must be hand-polished, paddles need no polish if made correctly.
I will run you through the drill for making paddles. Don’t forget that the only different between paddles and spoons is which end of the hammer-head you employ for the hammering.
Here’s what you do:
Take your .20 gauge wire in your left hand, and pull the tip out away from you just a few inches. You’ll be cutting pieces that are about 40mm, around an inch and a half, which you’ll be curving and pounding out, as I’ll direct. You can also use the slightly smaller and slightly cheaper .22 gauge, but it won’t be as impressive.
Use your flush-cutter open side away from you, which is flush-side toward you, and cut many many lengths of short wire averaging 40mm each. MAKE CERTAIN that you lay them out on the work-table in the same direction, so the sharp end is always toward you, and the flush end is on the far end, away from you.
You need some length in your paddle wire that will allow for your attempts to first form a curve, and then flatten the wire at right-angles, 90 degrees, to the curve.
Here’s what to do next:
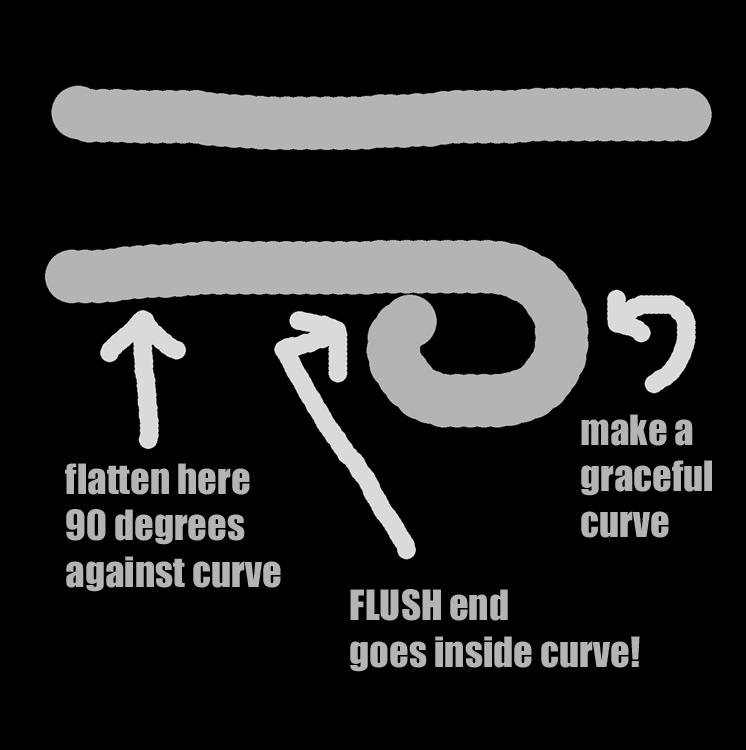
You’ll pick up the wire so the FLUSH end is UP. Using your needlenose pliers, gently COAX the FLUSH end of the wire into a gentle and graceful curve, making a full loop all the way to the wire again, with NO gap, NONE. I hope that’s clear. I don’t want to hear later that I didn’t mention NO GAP.
Some lessons need to be expensive to learn — I hope that’s not the case here.
Okay, so you’ve bent the flush end of the wire into a loop, leaving a longish, but not TOO long, straight end. How long these paddles are is entirely up to you, but I advise staying close to my measure, or face dire consequences, such as dangling down so far they get tangled up in hair, or annoy the skin on the shoulder and yes, this is a common complaint about long earrings, and ancient earrings of this type were in fact long by any standards, Hellenistic doubly so.
NOW PAY CLOSE ATTENTION BEFORE YOU TRY THIS!!!
USING YOUR FINGERTIPS, hold the little curved wire as if it were a gun, like this:
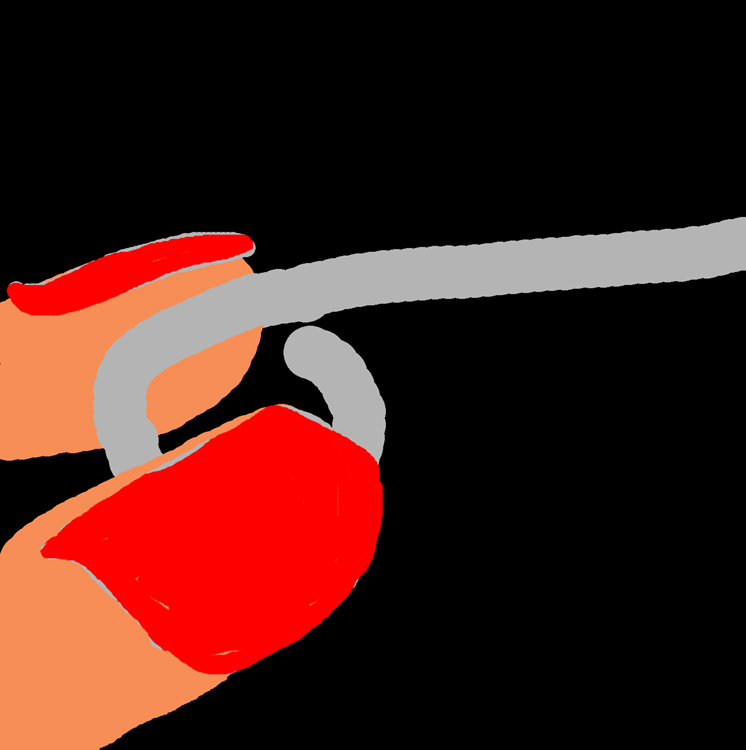
This is the correct way to hold the wire before hammering it on your anvil or steel plate. When you hold it this way, the top of the wire will be flattened down at 90 degrees from the curve.
This will allow the articulated dangling part to flash correctly. Articulated is a very precise and very professional jeweler’s term. Let’s examine it for a moment. If the loops are too small, the part won’t move, and that means it is NOT articulated.
Articulation depends upon freedom of movement.
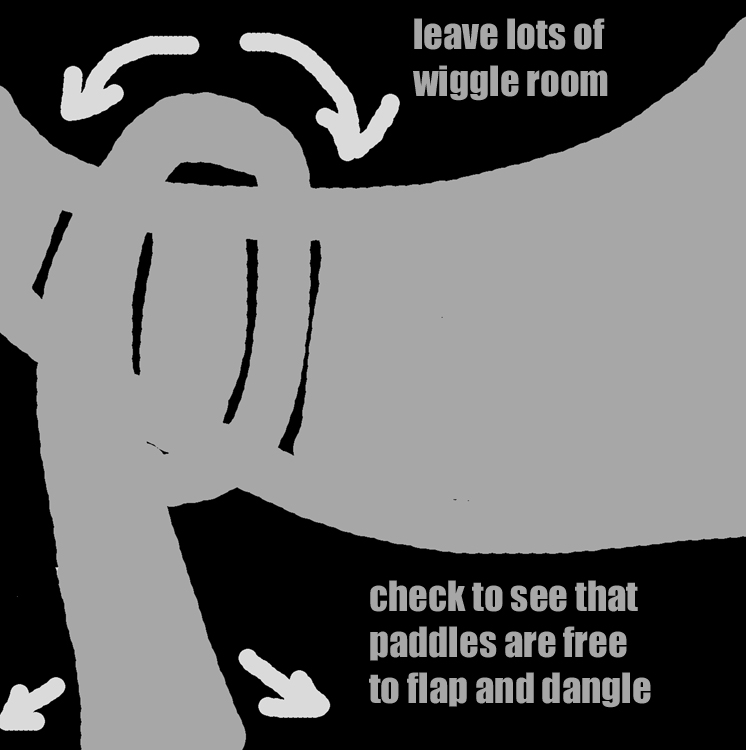
Make absolutely certain that your loops are not too small. Be generous with precious metals and trust that it will come back to you, if not in one form, then in another. If your spoons or paddles don’t swing back and forth as well as to and fro, you’ve got a cramp in your loop, and you need to increase your generosity factor by whatever percentage, to get that loop open enough to allow the dingle to dangle.
How you use spoons and paddles will vary with the product, but generally, they like to hang in groups of three, not necessarily loaded on in the same orientation, but sometimes will look impressive in groups of five and even seven, if they are of widely differing lengths.
Lengths up to 2 1/2″ will be tolerated by long-necked women, but most will be happier with dangles at about an inch and a half.
DO NOT HAMMER THE WHOLE THING! Just the tip, making it into as perfect a tear-drop shape as you can muster. You shouldn’t need to flush-cut this bottom tip of the spoon or paddle, because proper hammering will yield a smooth and perfectly rounded shape with no rough or sharp edges.
Don’t hammer too flat. The metal needs some thickness. The hammered part should have a gentle slope if seen on edge, not to a point, not sharp anywhere.
WATCH the shape of the paddle as you hammer. STOP before you ruin it, if you can!
You won’t believe how many things you can make with this simple Stone-Age solution to good taste and good fashion.
See You At The Top!!!
gorby